How You Can Host Ghost For Free

I lied, you can’t host Ghost for free, at least can’t use it properly. But there is a workaround, I will discuss it now.
From the very beginning, I had a crush on Ghost. Not only I found it’s UI is cool, but also many of my favourite bloggers use this. If you want to use Ghost you have to pay $29 per month, or as it’s an open-source project, you can host it Digitalocean’s droplet, which starts from $5 per month.
Being poor, I couldn’t afford those. But fortunately, I came to know about Jekyll and GitLab Pages. There is a Jekyll theme available called Jasper2(https://github.com/jekyller/jasper2) which is made based on Ghost UI. It works almost the same as Ghost. Jekyll is a static site generator based on Ruby. And GitLab Pages lets us host static websites for free, they even support custom domains and SSL. Perfect for my blog! Let's get started.
At first, we will host the Jasper2 with GitLab Pages.
- Create ruby development environment (skip if you have already)
I am showing the MacOS version here, if you use windows please google for the procedure.
Install Home-brew If you don’t have it yet.
   ```
   /usr/bin/ruby -e “$(curl -fsSL https://raw.githubusercontent.com/Homebrew/install/master/install)”

   brew install ruby
   ```
Don’t forget to add the brew ruby path to your shell config :
export PATH=/usr/local/opt/ruby/bin:$PATH
Then relaunch your terminal and check your updated Ruby setup:
ruby -v
You will see your ruby version if it is installed properly.
- Install Jekyll and bundler gems
in your command line, type -
gem install jekyll bundler
- Clone Jasper2(https://github.com/jekyller/jasper2) repository and move the origin to Gitlab.
Jasper2 was hosted in GitHub, in this tutorial we will use Gitlab, so we need to change the origin. First create a project in gitlab. Make it public or private doesn’t matter. Then execute the following commands.
   git clone https://github.com/jekyller/jasper2.git
   cd jasper2
   git remote remove origin
   git remote add origin https://yourGitlabUserName:yourGitlabPassword@gitlab.com/saadnoor123/yourGitlabProjectName.git
   git add .
   git commit -m "Moved to Gitlab"
   git push -u origin master
- Create a gitlab-ci.yml file.
.gitlab-ci.yml is Gitlab project’s configuration file. Gitlab will host your site from a directory named public, so we have to put all our static html/css/js files to that folder.
Create a file named .gitlab-ci.yml on the root of your project. And paste the following code there.
  image: ruby:2.3

   cache:
     paths:
       - vendor/

   before_script:
     - bundle install --path vendor

   pages:
     stage: deploy
     script:
       - bundle exec jekyll build -d public
     artifacts:
       paths:
         - public
     only:
       - master

   test:
     stage: test
     script:
       - bundle exec jekyll build -d test
     artifacts:
       paths:
         - test
     except:
       - master
When you will push to master branch, it will build and deploy the static codes to your GitLab Pages site.
- Update
_config.ymlfile
In Jekyll_config.ymlstores all the necessary information regarding your sites. Please update them with your preference. Don’t forget to update baseurl and URL to
baseurl: "/"
url: “/“
If you don’t want to use custom domain, keep the baseUrl same as your project name.
Now, push and wait for some time. Your site will be live initially at: https://yourGitlabUserName.gitlab.io/yourProjectName
Now that we hosted our site, we want to add custom domain to our site.
2. Go to Project Settings, then Pages. Here click the button named new domain. You will see a page like this:

Don’t forget to mark automatic certificate management using LE if you don’t have an SSL for your domain.
- After clicking
create New Domainbutton you will see a page like this
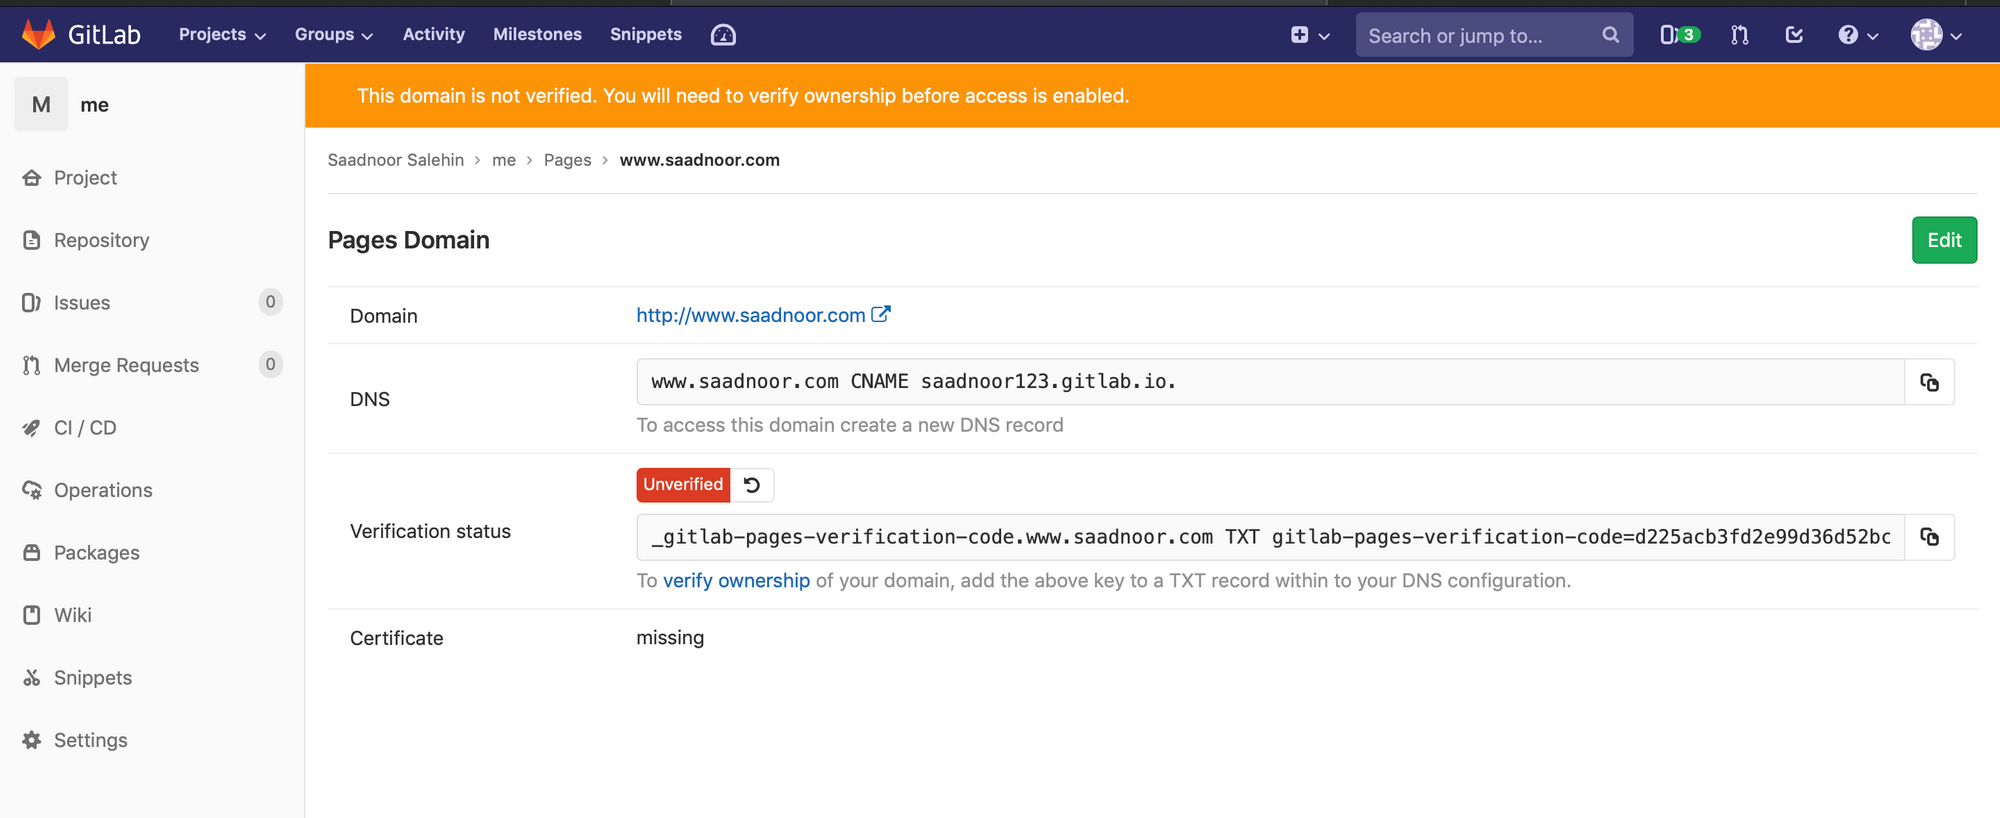
From the verification status copy the gitlab-pages-verification-code=yourGitlabVerificationCode portion.
- Now go to your Hosting provider, I used Namecheap(www.namecheap.com), in their advanced DNS option:
- create a TXT record. Put Host
@and valuegitlab-pages-verification-code=yourGitlabVerificationCode - Then create an A record and put host
@and value35.185.44.232(This is GitLab Pages’ IP address)
Now click the refresh icon of unverified label, domain will be verified.
And Boom! That’s it. If you follow these steps properly, you have successfully set up your site with a custom domain and SSL. If you face any difficulty or have any feedback regarding this tutorial, let me know by email.
NOTE: For running jasper2 locally, go to the command line and navigate to the jasper2 directory, then write
bundle exec jekyll serve